What You’ll Need to Crochet a Tarantula
Embarking on a crochet tarantula project for your twins is an exciting endeavor, promising both fun and a unique handmade toy. Before you begin, gathering the right materials is crucial for a smooth and enjoyable crafting experience. The following sections will guide you through the necessary supplies and tools, ensuring you’re well-prepared to bring your crochet tarantula to life. This preparation will set the stage for a successful project, allowing you to focus on the creative process and delight in the finished product with your children. Remember, having everything ready upfront minimizes interruptions and maximizes your crafting time, making it a more rewarding experience.
Yarn Selection
The choice of yarn significantly impacts the final look and feel of your crochet tarantula. For a realistic appearance, consider using yarn that mimics the texture and color of a tarantula. Worsted weight yarn is a popular choice due to its versatility and ease of use, ideal for beginners. Alternatively, for a fuzzy, more realistic effect, you can explore yarns with a brushed or textured finish. The color options are virtually limitless, from browns and blacks to more vibrant, artistic choices. Select colors that appeal to your twins and that will bring the tarantula to life. Don’t be afraid to experiment with different shades to create a unique and personalized creature. Keep in mind that yarn also impacts the durability of the project, choose a yarn that can withstand regular play.
Color Choices and Combinations

When choosing colors, consider the specific tarantula species you’re aiming to replicate or go wild with creativity! Many tarantulas have earthy tones like brown, black, and tan, so these are excellent starting points. You can combine multiple shades of brown for a more realistic appearance or incorporate stripes or patterns by changing colors during the crochet process. For a more whimsical design, consider brighter colors or even neon shades to make the tarantula a fun and playful toy for your twins. Using a combination of colors can add depth and visual interest. Think about how the colors will complement each other and create a balanced aesthetic. A good tip is to sketch out your color scheme before starting to ensure you are happy with the final look.
Hook Size and Material
The crochet hook size is another critical factor in achieving the desired outcome for your tarantula. The recommended hook size will typically be indicated on the yarn label, but you can adjust it slightly depending on the desired density of the fabric. For a tighter stitch, use a smaller hook size, and for a looser stitch, use a larger one. Choose a hook made from a material you find comfortable to work with, such as aluminum, plastic, or wood. Ergonomic hooks with comfortable handles can also be helpful, especially if you plan to spend extended periods crocheting. Make sure the hook size is appropriate for the yarn weight you’ve chosen; this will ensure that your tarantula has a well-defined shape and avoids gaps or loose stitches. Remember, consistency in tension is key, so the hook and yarn combination plays a crucial role.
Other Essential Tools
Besides yarn and a hook, several other tools are essential for completing your crochet tarantula. These tools will help you with different steps in the process, from preparing the yarn to assembling the finished product. The right tools make the craft easier and guarantee a more professional finish, making the whole experience enjoyable for both you and your twins. Preparing these items beforehand can streamline your crafting and ensure you’re not interrupted by the need to search for missing supplies.
Scissors

A sharp pair of scissors is vital for cutting yarn cleanly, both at the beginning and end of your project. They’re also necessary for cutting yarn tails and trimming any excess material. Small, sharp scissors are best for precision work, allowing you to cut close to the stitches without damaging them. Keep your scissors handy and within easy reach, so you can quickly and easily trim yarn ends as you work. Well-maintained scissors make the whole process smoother and safer.
Tapestry Needle
A tapestry needle, also known as a yarn needle, is a blunt-tipped needle with a large eye, designed to thread yarn easily. This tool is indispensable for weaving in the ends of your yarn, securing loose threads, and attaching different pieces of the tarantula together. Its blunt tip prevents it from splitting the yarn, ensuring your work remains neat and professional. Having a tapestry needle in your tool kit will help you finish your crochet tarantula project with a polished, tidy finish. Invest in a good quality needle that’s easy to thread, as this will save you time and frustration.
Stitch Markers
Stitch markers are small tools used to mark specific points in your crochet, such as the beginning of a row or increases and decreases. They’re particularly helpful when working in the round, ensuring you don’t lose track of where you are in the pattern. You can use commercial stitch markers or make your own with safety pins or small pieces of yarn in a contrasting color. Stitch markers are especially valuable when working on complex patterns or when you’re a beginner, helping you keep track of your stitches. Place and remove stitch markers carefully to avoid damaging your work.
The Crochet Tarantula Pattern
Selecting the right crochet pattern is essential for a successful tarantula project. There are numerous patterns available online, ranging from beginner-friendly to more advanced designs. Choose a pattern that matches your skill level and offers clear instructions, diagrams, and stitch counts. Look for patterns that include details like how to crochet the body, legs, and eyes, as well as instructions on assembling all the parts. Ensure the pattern is easy to understand, ideally using standard crochet abbreviations. Before starting, read through the entire pattern to understand the steps involved. This will help you identify any potential challenges and prepare the necessary materials. If the pattern includes photos, use them as a visual guide throughout your project.
Understanding the Pattern
Once you’ve chosen a pattern, carefully review it to ensure you understand all the instructions and abbreviations. Pay close attention to the stitch counts and the order in which the different parts of the tarantula are constructed. Familiarize yourself with any special techniques used in the pattern, such as working in the round, increasing, and decreasing. If the pattern includes diagrams, study them carefully to understand how the stitches are formed. Mark each step as you complete it, or highlight it with a highlighter. If any part of the pattern seems unclear, do some research online for tutorials on specific crochet techniques or abbreviations. Understanding the pattern thoroughly will make the crocheting process much easier and more enjoyable.
Abbreviations and Techniques
Most crochet patterns use standard abbreviations to keep instructions concise. Common abbreviations include sc (single crochet), dc (double crochet), inc (increase), dec (decrease), and sl st (slip stitch). Make sure you understand these abbreviations before starting. Learn the basic crochet techniques such as how to make a magic ring, how to increase and decrease stitches, and how to work in the round. If you are new to crochet, start with some basic tutorials or beginner-friendly patterns to learn the fundamentals. Familiarizing yourself with these techniques will enable you to work through the tarantula pattern with confidence and precision. Practice these techniques on scrap yarn to gain confidence before starting the main project.
Body Construction

The body construction of your crochet tarantula typically involves crocheting the head and abdomen separately and then joining them. You’ll work in continuous rounds, gradually increasing and decreasing stitches to shape the body. Pay close attention to the stitch counts to ensure the shape is maintained. Begin by crocheting a magic ring, then follow the pattern’s instructions for increasing stitches to create the body’s bulk. The pattern will guide you through creating the rounded shape of the head and abdomen. Make sure you are working in the right direction, typically in a spiral or continuous round. After the body is formed, it is usually stuffed with fiberfill to give it a three-dimensional appearance. Use stitch markers to keep track of your rows and stitch counts. Precise body construction ensures the tarantula looks appealing.
Crocheting the Head and Abdomen
The head and abdomen are the main parts of the tarantula’s body and will be crocheted separately. Begin with the abdomen; follow the pattern instructions to crochet in a circle and increase stitches gradually to create the desired size and shape. The head, usually smaller, is similarly constructed, often with a slightly different pattern. The pattern will indicate how to increase or decrease stitches to shape each part correctly. Keep in mind the size and proportions of a real tarantula when working. After completing the head and abdomen, you can join them together. Ensure the stitches are secure when joining to prevent any separation. When crocheting the head and abdomen, use stitch markers to make it easier to stay on track with the number of stitches.
Adding Details
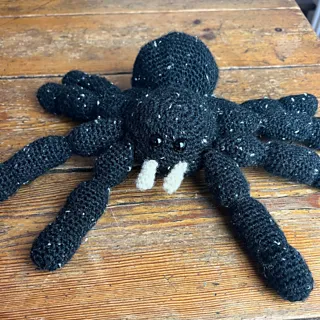
Once the head and abdomen are assembled, focus on adding details to bring your tarantula to life. These details might include crocheting or attaching small tufts of yarn for hair, creating a textured surface to mimic the tarantula’s exoskeleton, or adding small spots or stripes using a different color yarn. You can also add embellishments, such as small beads or buttons for additional texture. Think about the characteristics of a real tarantula and how you can incorporate these details into your crochet project. Using different crochet stitches, like the bobble stitch or the popcorn stitch, will add texture. Ensure all details are securely attached to prevent them from coming loose. This stage is where you can truly personalize your tarantula, making it unique and exciting for your twins.
Leg Creation and Attachment

Creating the legs is a key step in making your crochet tarantula realistic. The legs are typically crocheted separately and then attached to the body. Patterns vary in the complexity of leg construction. Some designs may involve shaping the legs with increases and decreases, while others may use a simpler approach. Be sure to crochet each leg to the same length and shape, ensuring symmetry. Decide how you want the legs to be posed – bent, straight, or in a specific position. When attaching the legs, use sturdy stitches and a tapestry needle to ensure they’re firmly secured to the body. Properly attached legs will provide stability and a realistic appearance to your tarantula. Consider using wire in the legs for poseability; this step will increase the fun and interest of the final toy.
Crocheting the Legs
The pattern will guide you on crocheting each leg. Legs are typically small and cylindrical or tapered. Work in a continuous round, following the pattern’s instructions to create the correct shape and length. When crocheting the legs, pay attention to the stitch counts and any shaping instructions. Varying the color of the legs can add depth and visual interest to the design. Ensure each leg is consistent in size and shape, as this is important for the final appearance and balance of the tarantula. You might use a hook size slightly smaller than the body to create tighter stitches for the legs. For added realism, you can crochet small claws or joints using different yarn colors and attaching them to the legs.
Attaching the Legs
Attaching the legs to the tarantula’s body is crucial for giving it a finished look and poseability. Using a tapestry needle and sturdy yarn, carefully sew the legs to the body, ensuring they are securely attached. Position the legs in a way that is both aesthetically pleasing and functional. Consider how the legs will support the tarantula. You can adjust the positioning of the legs to create a standing, crawling, or resting pose. Stitch the legs using a consistent stitch to prevent gaps and ensure a clean look. Test the placement before fully securing the legs. The placement should align with the proportions of the tarantula’s body. Double-check the security of each leg to prevent it from detaching during play. Ensure that the legs are positioned in a way that gives the tarantula a stable base.
Adding the Finishing Touches

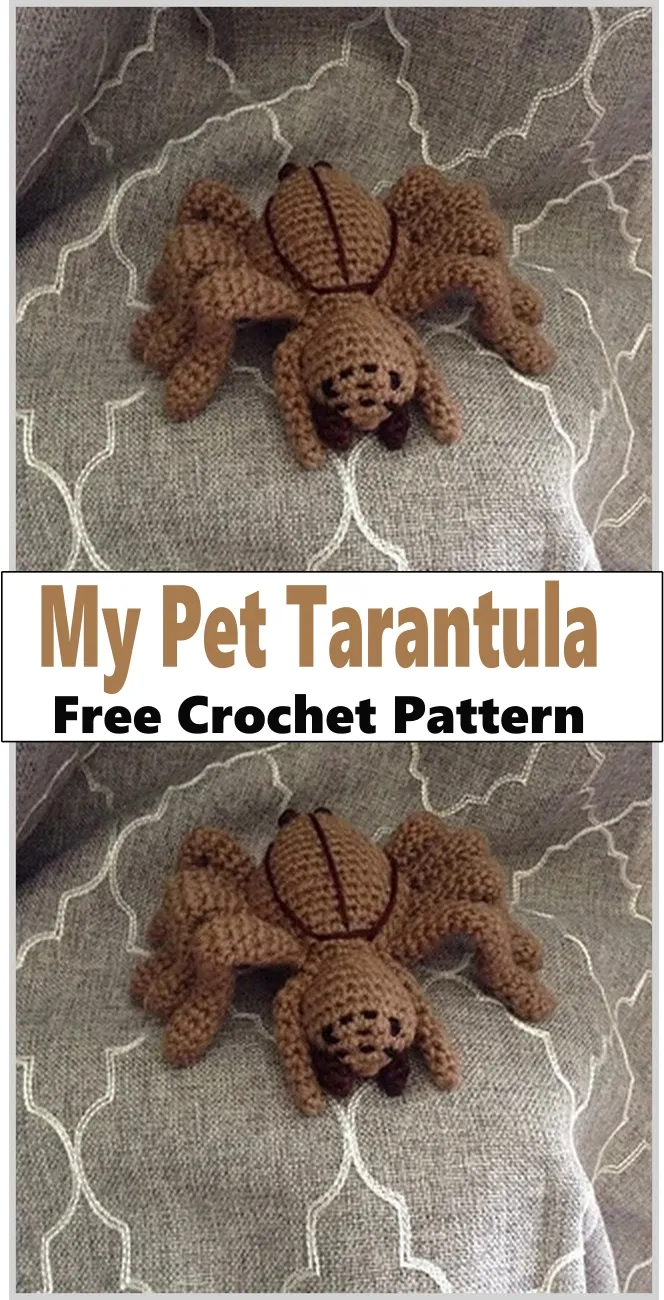
Once you’ve assembled the body and legs, it’s time to add the finishing touches that will make your crochet tarantula truly unique. These details will add character and realism to the finished piece. The finishing touches include embroidering eyes, adding fangs, and stuffing and shaping the tarantula. The details you add can transform the character of your tarantula from a simple toy to a creature full of personality, guaranteeing that it captivates the twins. These final steps are a great opportunity for personalization, making your tarantula unlike any other.
Embroidering the Eyes
Adding eyes to your tarantula is crucial for bringing it to life. Embroider the eyes using yarn or thread in your desired color, typically black or white. You can use basic embroidery stitches, such as the French knot or the satin stitch, to create the eyes. Consider the size and placement of the eyes. Use a contrasting color to add highlights for more realistic eyes. If you choose to use safety eyes, make sure they are properly secured to prevent choking hazards. If using embroidered eyes, ensure they are symmetrical and even. Experiment with different eye shapes and sizes. Adding small, shiny beads or buttons can also create a unique look. The eyes are a focal point of your crochet tarantula, so take your time and pay attention to detail.
Adding Fangs
Adding fangs will provide a distinctive characteristic to your crochet tarantula. Fangs can be crocheted separately and then attached to the head, or they can be created using felt or other craft materials. If crocheting the fangs, use a small hook and a contrasting color of yarn. Crochet two small cone-shaped pieces and attach them to the tarantula’s head. Consider the placement of the fangs, ensuring they look realistic. Felt fangs can be cut, shaped, and glued to the head. When using glue, ensure it is safe for children and that the bond is secure. Adding fangs can transform a cute toy into a realistic tarantula. The fangs will add a touch of spookiness to your creation.
Stuffing and Shaping the Tarantula
Stuffing and shaping the tarantula finalizes its appearance. Use fiberfill or polyester stuffing to give the body and head their shape. Add stuffing gradually, distributing it evenly throughout the body to prevent lumps. Shape the tarantula as you stuff, ensuring it has a realistic appearance. Close any remaining openings after stuffing. Use your hands to smooth and shape the tarantula. Stuffing can be added or adjusted. Adjust the amount of stuffing until the tarantula has the desired firmness and shape. Pay special attention to the head and abdomen, ensuring they are well-defined. A well-stuffed and shaped tarantula will look more appealing and durable.
Tips and Tricks for Success
Successfully crocheting a tarantula involves more than just following the pattern; it also requires patience, attention to detail, and the right approach. The following tips and tricks will help you improve your crafting experience. These suggestions cover everything from maintaining consistent tension to troubleshooting issues. These steps will not only help you improve your craft but also guarantee a more enjoyable experience while crocheting. Keep in mind that crafting should be fun, so don’t be afraid to experiment and add your creative touches to your projects. These tips ensure a smooth and enjoyable crafting session.
Maintaining Consistent Tension
Maintaining consistent tension is one of the most important aspects of crochet. Consistent tension means that each stitch is pulled to the same tightness, resulting in an even fabric. Inconsistent tension can lead to loose stitches, uneven edges, and an overall unprofessional look. To maintain consistent tension, hold your yarn and hook the same way throughout the project. Practice keeping your stitches uniform. Do not pull the yarn too tight, as this can make the fabric stiff and difficult to work with. If you are prone to tightening your stitches, try using a larger hook size. If you tend to make loose stitches, consider using a smaller hook. Take breaks as needed to avoid hand fatigue. A relaxed approach will help you maintain consistent tension.
Avoiding Common Mistakes
Avoiding common mistakes is crucial to a successful project. One common mistake is forgetting to increase or decrease stitches in a pattern, which can change the final shape. Double-check your stitch counts frequently, using stitch markers. Another common mistake is working into the wrong stitch, so pay careful attention to your hook placement. Avoid skipping stitches or adding extra stitches, as this can create holes or distortions in the fabric. If you make a mistake, don’t hesitate to unravel and correct it. Learning to read your stitches and understand how they form is essential for identifying and correcting mistakes. Take your time, and be patient. Correcting mistakes will help you improve your crocheting skills.
Troubleshooting Challenges
When crocheting, you may encounter challenges, but they can be overcome with persistence and problem-solving skills. If you are having trouble with a particular stitch or technique, look for online tutorials or videos. Refer to your pattern and double-check your stitch counts. If the fabric is curling or bunching, you might need to adjust your hook size. If the legs are not attaching properly, reposition them or try a different attachment method. If you are having difficulty with a specific step, don’t be afraid to ask for help from a more experienced crocheter. Keep a notebook to record issues and solutions. Troubleshooting is part of the learning process. Every challenge you overcome makes you a more skilled crocheter, and you’ll create something wonderful for your twins.