Unboxing Your Tevo Tarantula
The journey of creating something tangible from digital designs begins with the unboxing of your Tevo Tarantula 3D printer. This initial step is exciting, as it’s your first physical interaction with the components that will bring your ideas to life. Carefully unpack the box, taking note of the contents. You’ll likely find the frame components, various electronic parts, the heated bed, and the extruder assembly. This initial assessment is crucial to ensure you have everything you need. It’s advisable to clear a large workspace to lay out all the parts. This will help you identify each component and organize them for the assembly process. Remember to retain the original packaging; it can be useful for storing the printer or in case you need to transport it in the future. The unpacking process gives you a comprehensive view of the project ahead and sets the stage for the subsequent steps of the Tevo Tarantula assembly.
Checking the Parts and Tools
Once you have everything unpacked, it’s critical to check that all parts are present and accounted for. Compare the contents of the box with the parts list provided in the Tevo Tarantula assembly instructions. Often, this list is a printed manual or available online. Make sure to identify each part and its corresponding quantity. This step helps to prevent any delays during the assembly. Common tools that you will need, but aren’t always included, are Allen wrenches (hex keys) of various sizes, a Phillips head screwdriver, and possibly a pair of pliers. Having these tools readily available will streamline the assembly process. In addition to the physical components, check for any damage during shipping. Report any missing or damaged parts to the supplier immediately. This proactive approach ensures a smooth assembly process and prevents frustrations down the line.
Preparing the Frame for Assembly

The frame is the backbone of your Tevo Tarantula and provides the structure that supports all other components. Begin by familiarizing yourself with the frame’s design. You will need to identify the different frame pieces, such as the vertical supports and the horizontal beams. Typically, the frame consists of aluminum extrusions or other rigid materials. Before assembling, clean the frame components. Any dust or debris can interfere with the secure fit of the parts. Use a soft cloth or brush. Next, examine the frame for any pre-drilled holes or mounting points. The instructions will guide you on how these parts fit together. Depending on the design, you may need to attach corner brackets or connectors. Ensure that all connections are tight and secure, as this will affect the stability of the printer. This preparation step ensures a stable and accurate base for the remainder of the Tevo Tarantula assembly.
Assembling the Base Frame
The base frame is the foundational element upon which the rest of the 3D printer is built. Carefully follow the instructions for the base frame assembly. This usually involves attaching the horizontal beams to the vertical supports. Use the appropriate fasteners, such as screws and bolts, to secure the frame components together. During assembly, it’s essential to ensure that the frame is square and level. Use a carpenter’s square or a similar tool to check the corners. A misaligned base frame can cause issues with printing accuracy. Tighten the screws gradually and evenly to prevent warping or distortion of the frame. Once the base frame is assembled, double-check all connections to make sure everything is secure. This step sets the stage for the installation of the Z-axis, which carries the print bed, and ensures that the Tevo Tarantula assembly is built on a solid foundation.
Attaching the Z-Axis Components
The Z-axis controls the vertical movement of the print bed, allowing the printer to build layers in the Z direction. The Z-axis components typically include threaded rods, stepper motors, and linear bearings. The stepper motors will drive the threaded rods, which in turn move the print bed up and down. Start by attaching the Z-axis supports to the base frame. These supports provide the structure for the threaded rods. Then, insert the threaded rods through the appropriate holes in the frame. Secure the stepper motors to the frame. Make sure they are aligned correctly. Next, install the linear bearings, which guide the print bed along the Z-axis. These bearings help ensure smooth vertical movement. When attaching components, ensure the Z-axis rods are parallel to each other. Proper alignment is essential for accurate printing. Carefully follow the instructions to ensure the Z-axis moves smoothly and without binding. The Z-axis is one of the most important and complex parts of the Tevo Tarantula assembly, so take your time and make sure all parts are properly aligned and secured.
Installing the X-Axis Gantry

The X-axis gantry holds the hotend and extruder, and moves horizontally across the print bed. This component often consists of an extruded beam and linear bearings or wheels that allow it to move smoothly along the frame. Begin by attaching the X-axis gantry to the Z-axis supports. This step usually involves sliding the gantry onto the linear bearings or wheels. Ensure that the gantry moves freely along the Z-axis supports. If the gantry is too tight, adjust the bearings or wheels. The gantry must move smoothly without any resistance. Next, install the belts that drive the X-axis movement. These belts are attached to the stepper motor and pulleys. Make sure the belts are properly tensioned. Too loose, and the gantry will not move accurately. Too tight, and the motor may struggle. Proper tension is key to achieving accurate prints. Carefully follow the instructions to ensure the X-axis gantry moves smoothly and is properly aligned. Proper assembly of the X-axis gantry is essential for precise horizontal movement during printing.
Wiring the Electronics
Wiring the electronics is a crucial, but often daunting, step in the Tevo Tarantula assembly. This involves connecting the various electronic components, such as the stepper motors, the hotend, the heated bed, and the endstops, to the control board. Begin by consulting the wiring diagram provided in the manual. Identify the wires for each component and their corresponding connections on the control board. Be extremely careful to match the wires to the correct terminals, as incorrect wiring can damage the components or the control board. Use the appropriate connectors and crimp tools to secure the wires. Ensure the wires are properly insulated to prevent short circuits. Route the wires neatly and organize them with cable ties. This will prevent them from interfering with the moving parts of the printer. Labeling each wire or using color-coded wires can make the process easier and help with troubleshooting. Double-check all connections before powering on the printer. Proper wiring is essential for the safe and reliable operation of your Tevo Tarantula.
Connecting the Stepper Motors
The stepper motors control the movement of the X, Y, and Z axes, as well as the extruder. Each motor is connected to the control board via a set of wires. Identify the correct wires for each motor based on the wiring diagram. The wires usually have specific connectors that plug into the control board. Make sure the connectors are securely plugged in. Double-check that the motors are wired correctly to the appropriate motor drivers on the control board. Incorrect wiring can cause the motors to move in the wrong direction or not at all. Once the motors are connected, make sure they are properly mounted on the frame and gantry. The mounting should be secure. The motors will drive the belts and lead screws. The wires should be neatly routed to avoid interference with moving parts. After completing the connections, it’s a good idea to test the motors using the printer’s control interface to ensure they are functioning correctly and moving in the correct directions. Proper stepper motor connections are essential for precise and controlled 3D printing.
Installing the Hotend and Extruder

The hotend melts the filament, and the extruder pushes the filament through the hotend nozzle. The hotend typically includes a heater cartridge, a thermistor, and a nozzle. Begin by assembling the hotend. Follow the instructions provided. The nozzle must be securely attached to the heat block. The heater cartridge and thermistor are installed into the heat block. Next, install the hotend on the X-axis gantry. The hotend is usually mounted on a bracket or carriage. Ensure that the hotend is properly aligned and that the nozzle is positioned correctly relative to the print bed. The extruder feeds the filament into the hotend. The extruder assembly includes a motor, a hobbed gear, and an idler. Install the extruder on the gantry. The hobbed gear grips the filament and pushes it into the hotend. The idler applies pressure to the filament. Once the hotend and extruder are assembled and installed, you can test the heating of the hotend and the feeding of the filament. Be careful not to touch the hotend when it’s hot. The proper installation of the hotend and extruder is crucial for successful 3D printing.
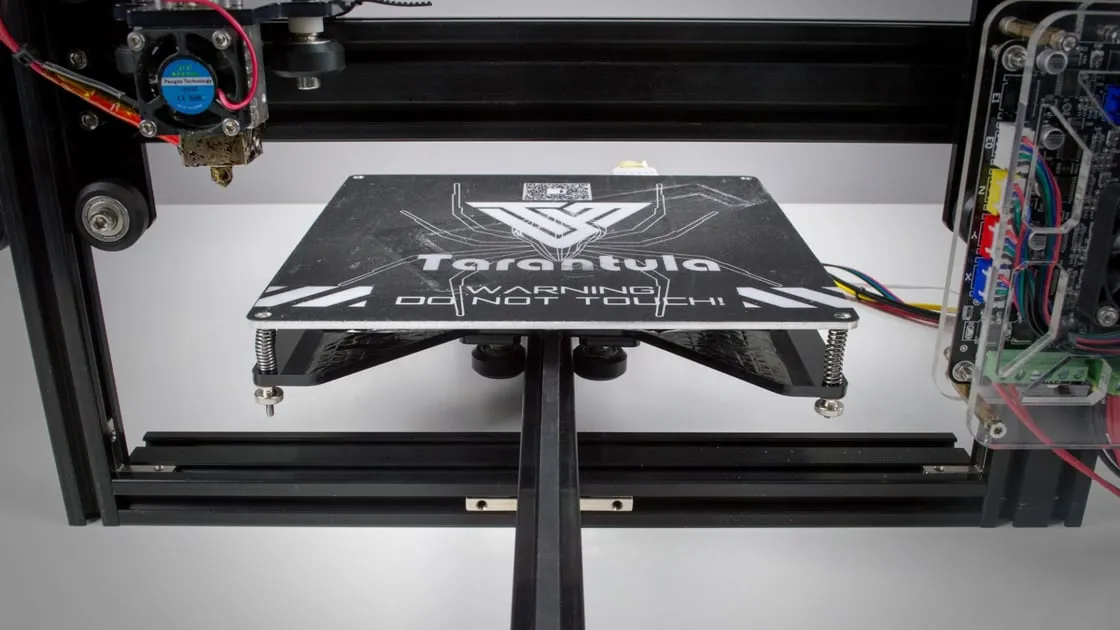
Connecting the Heated Bed
The heated bed provides a surface for the first layer of the print to adhere to. This component is essential for printing with many materials. Install the heated bed on the Z-axis supports. Ensure that it is securely mounted and level. The heated bed is usually powered by a separate power supply or connected to the main power supply through the control board. Identify the correct wires for the heated bed and connect them to the appropriate terminals. Make sure to check the voltage of the heated bed and ensure that the power supply is compatible. Incorrect wiring or voltage can damage the heated bed or the control board. You’ll also need to connect a thermistor to the heated bed to measure its temperature. The thermistor provides feedback to the control board. This is essential for regulating the bed temperature. After completing the wiring, test the heated bed. Ensure it heats up to the desired temperature. The heated bed is essential for adhesion and print quality.
Leveling the Print Bed
Leveling the print bed is one of the most important steps in the Tevo Tarantula assembly. Start by ensuring that the print bed is clean and free of any debris. Use a level or a straight edge to check the level of the print bed relative to the nozzle. The print bed must be perfectly level. If not, it will result in poor first-layer adhesion. Many 3D printers, including the Tevo Tarantula, have leveling screws or knobs. These can be used to adjust the height of the print bed at different points. Adjust the leveling screws or knobs until the nozzle is the correct distance from the print bed at all points. This distance is often set by using a piece of paper. Place the paper between the nozzle and the bed and adjust the bed height until the paper just scrapes against the nozzle when moved. Some printers have automatic bed leveling sensors. If your printer has one, follow the instructions to calibrate it. Take your time and be patient. Bed leveling can take several attempts to get right. Leveling is key to print success.
First Print and Calibration

Once your Tevo Tarantula is fully assembled and the bed is leveled, it’s time for your first print. Start by downloading a test print file, such as a calibration cube. Load the file onto an SD card or connect your printer to a computer. Then, load your chosen filament. Ensure that the filament is correctly loaded into the extruder. Preheat the hotend and the heated bed to the recommended temperatures for your filament. Start the print and monitor the first layer carefully. The first layer is crucial for the success of the entire print. If the first layer does not adhere properly to the print bed, adjust the bed leveling or the nozzle height. Make any necessary adjustments during the print. Once the print is complete, examine the finished model. Check for any defects or imperfections. After your first print, you may need to calibrate other settings, such as the extruder steps. Calibration is the process of fine-tuning the printer to optimize its performance. You may also need to adjust the print speed, temperature, and other settings to achieve the best results. Celebrate your success! You have now assembled your Tevo Tarantula 3D printer. Enjoy the exciting world of 3D printing!