The Tevo Tarantula, a popular DIY 3D printer, provides a fantastic entry point into the world of additive manufacturing. However, like any machine, its performance can be enhanced. One of the most impactful upgrades you can make is replacing the main board. This comprehensive guide will walk you through everything you need to know about upgrading your Tevo Tarantula main board, from understanding its components to troubleshooting common issues. This upgrade can significantly improve print quality, speed, and overall reliability. Let’s dive in and unlock the full potential of your 3D printer.
Understanding Your Tevo Tarantula Main Board
Before you begin the upgrade process, it’s crucial to understand the main board itself. The main board acts as the central control unit of your 3D printer, managing all the critical functions necessary for printing. It receives instructions from the host computer or SD card, controls the stepper motors, heats the bed and nozzle, and manages the overall operation of the printer. The main board is responsible for translating G-code instructions into physical movements and actions, making it the brain of your 3D printing operations. Understanding its role is fundamental for successful upgrades and maintenance.
Identifying the Main Board
The main board is typically located within the base of your Tevo Tarantula, often housed inside an enclosure for protection. To identify it, you’ll need to open the base and locate the circuit board with numerous connectors for stepper motors, endstops, the heated bed, the hotend, and the power supply. The main board is usually a rectangular printed circuit board (PCB) with various electronic components such as microcontrollers, drivers, and terminals. Refer to your printer’s manual if you’re unsure where to look or what to expect. Remember to disconnect the power supply before accessing the main board.
Components of the Main Board

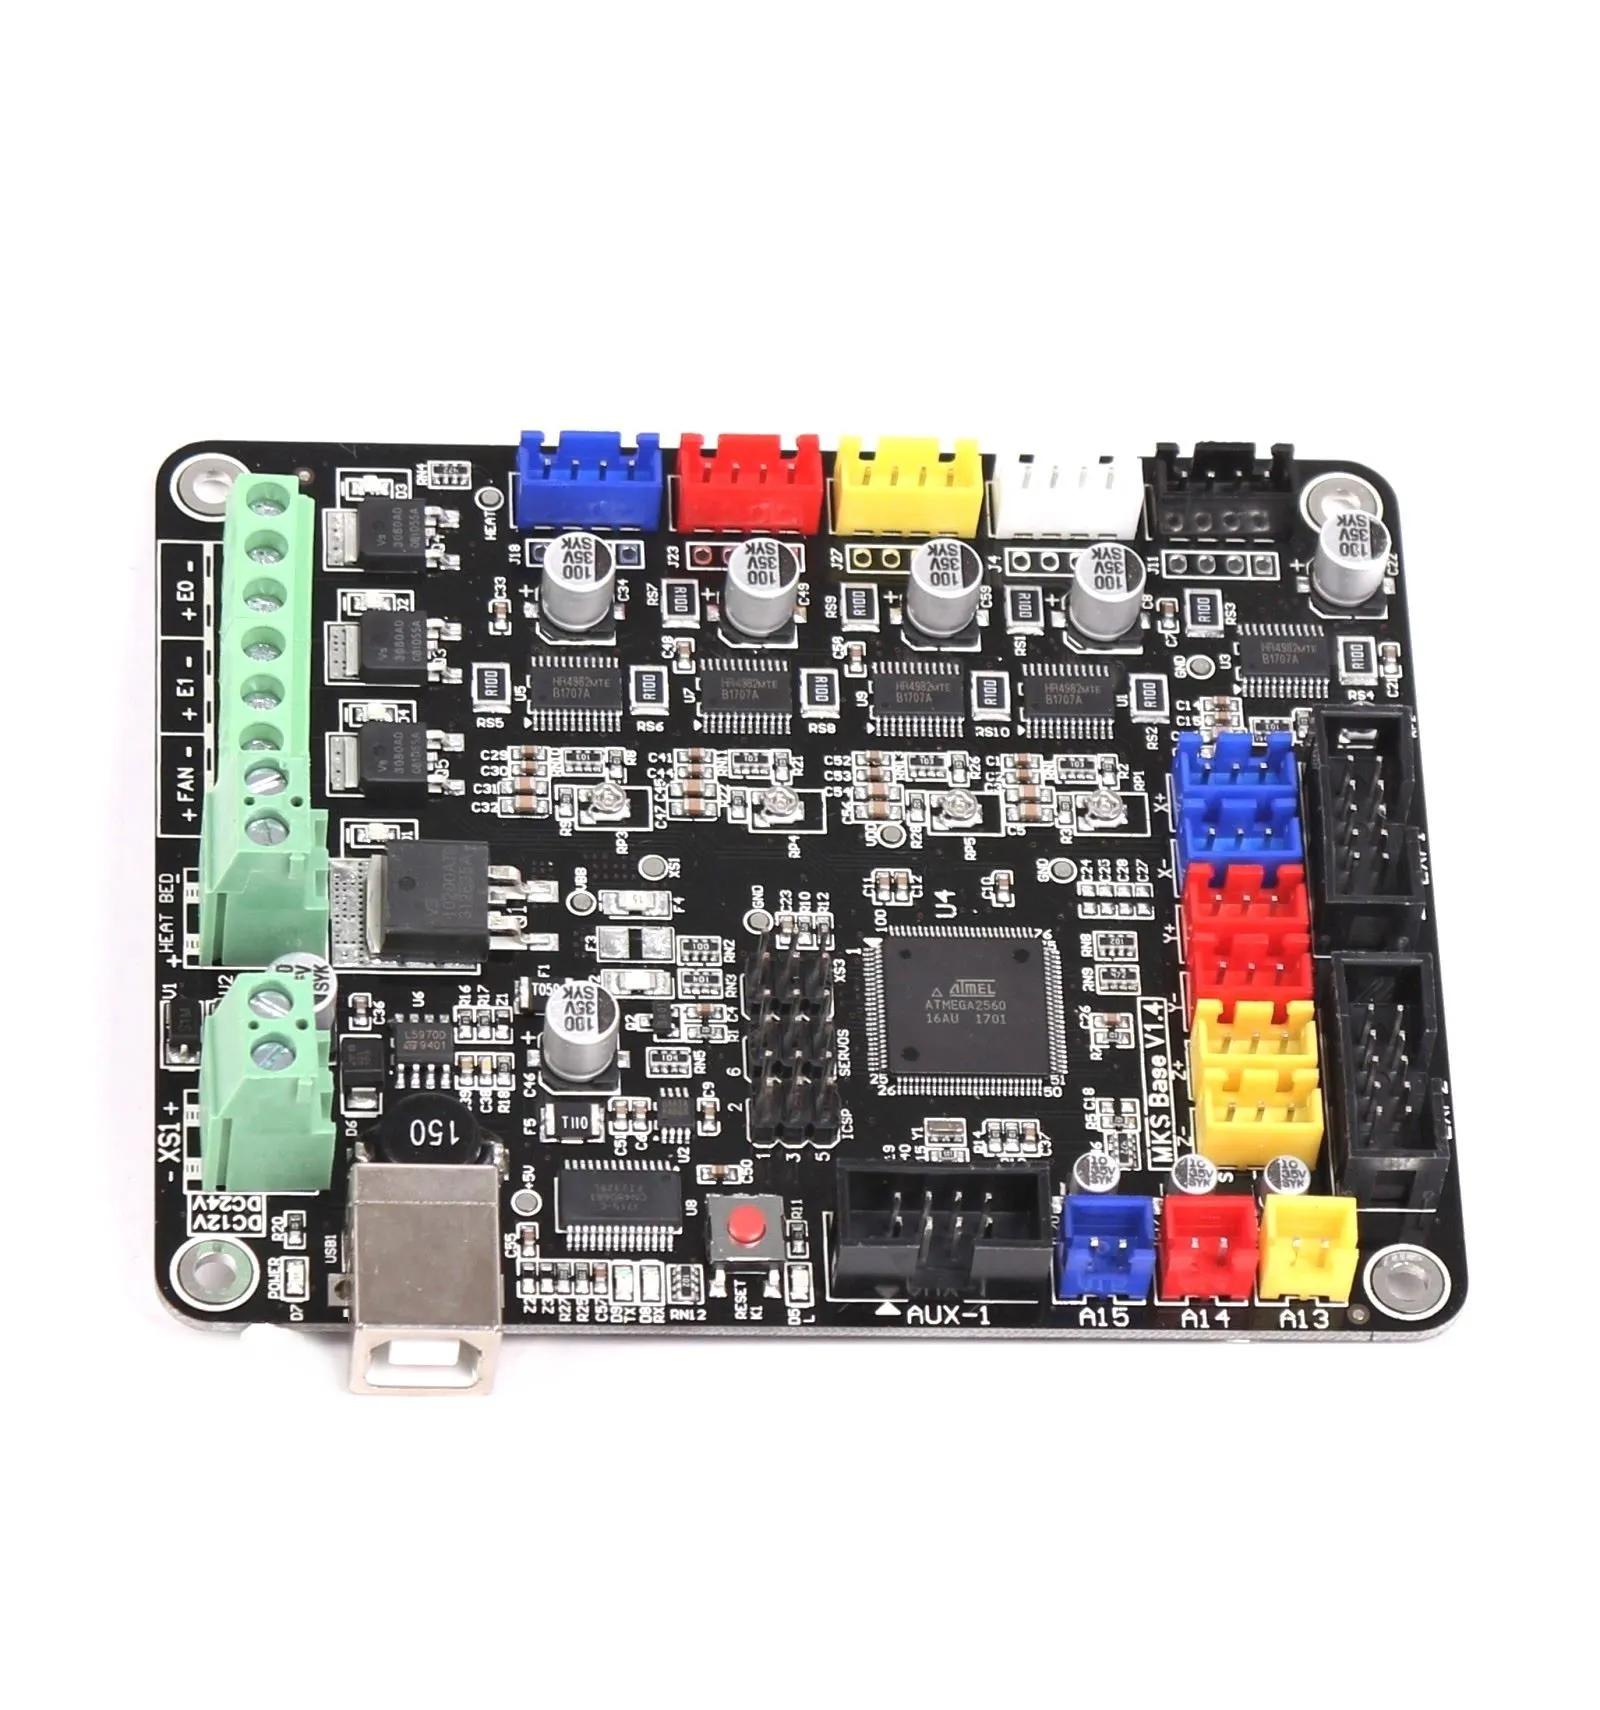
The main board comprises several key components that work in concert to manage the printer’s functions. These components include a microcontroller, such as an Arduino Mega, which is the processing unit of the board; stepper motor drivers that control the movement of the motors; MOSFETs that manage the power to the heated bed and hotend; and various connectors for endstops, thermistors, LCD screens, and other peripherals. These components allow the printer to translate digital instructions into physical actions, controlling temperature, movement, and overall printer behavior. Understanding these components will help in troubleshooting any future issues. (Image tevo-tarantula-main-board-components.webp)
Why Upgrade Your Tevo Tarantula Main Board
Upgrading the main board can significantly improve your Tevo Tarantula’s performance and functionality. The original main board, while functional, might be limited in its capabilities compared to newer, more advanced boards. Upgrading offers benefits such as improved print quality, faster print speeds, quieter operation, and enhanced features. A new board can handle more sophisticated firmware, offering advanced features like auto-bed leveling, filament runout detection, and even Wi-Fi connectivity. The upgrade can breathe new life into your 3D printer, making it a more efficient and enjoyable tool.
Benefits of Upgrading
The benefits of upgrading the main board are numerous. You can expect improved print quality due to more precise motor control and smoother movements. Faster print speeds are often achievable with newer boards that can handle more complex calculations and faster processing. Quieter operation is another significant advantage, as many upgraded boards come with advanced stepper motor drivers that reduce noise. Moreover, upgrading opens up access to advanced features such as auto-bed leveling, which simplifies the printing process, and firmware updates for ongoing improvements and new functionalities. This can transform a basic printer into a more advanced machine.
Common Issues Resolved by Upgrading

Upgrading the main board can resolve several common issues that plague older 3D printers. These issues include inconsistent print quality, such as layer shifting or surface imperfections. It can also fix noisy operation due to outdated stepper motor drivers. You might encounter difficulty with firmware updates or compatibility issues with certain features or accessories. A new main board resolves these problems by providing better hardware, improved drivers, and a more up-to-date firmware base, ensuring more consistent and reliable prints.
Choosing the Right Replacement Main Board
Selecting the right replacement main board is a critical step in the upgrade process. There are various options available, each with its features and capabilities. The choice of main board can significantly affect your printer’s performance. Research and selecting a suitable board is essential to ensure compatibility and achieve the desired results. Consider your needs and preferences carefully, evaluating aspects such as features, capabilities, and upgrade options. Making an informed choice will lead to a satisfying upgrade experience.
Factors to Consider
When selecting a new main board, consider factors such as the microcontroller type, the number of stepper motor drivers, the types of drivers used (e.g., TMC2208, TMC2209), the availability of features like auto-bed leveling support, and the board’s overall processing power. Also, assess your existing accessories and planned upgrades, making sure the new board supports them. Consider the firmware compatibility as well, whether it uses Marlin, Klipper, or another firmware. Consider the community support and documentation for easy setup and troubleshooting.
Compatibility Check

Before purchasing a new main board, check its compatibility with your Tevo Tarantula. Ensure that the new board has the necessary connectors and pinouts to match your existing components, such as the stepper motors, endstops, thermistors, and heated bed. Review the specifications of the new board to confirm that it supports your existing power supply and voltage requirements. If you plan to add any additional features or accessories, verify that the new board has the required ports and connections. Contacting the manufacturer or seeking online advice can help you ensure a smooth, trouble-free upgrade process. Also, you can compare photos of your current board with the new one. (Image old-vs-new-mainboard.webp)
Preparing for the Upgrade
Proper preparation is essential for a successful main board upgrade. Gathering the necessary tools and materials, taking appropriate safety precautions, and backing up your existing settings are important. Planning the procedure will reduce the risk of errors. This step involves disassembling your printer, understanding its components, and familiarizing yourself with the upgrade procedure. Careful preparation will smooth out the entire process.
Tools and Materials Needed
Gather the tools and materials required for the upgrade. You’ll need screwdrivers (Phillips and flathead), wire strippers and crimpers, a multimeter, and possibly a soldering iron and solder. Also, have a set of hex keys, cable ties, and a way to organize your screws and connectors. You’ll likely need a new main board, possibly new stepper motor drivers, and potentially new wires. Keep your printer’s manual handy. It’s good practice to have a well-lit, clean workspace to keep your parts organized. (Image tools-for-upgrade.webp)
Safety Precautions

Safety should always be your top priority when working with electronics. Disconnect the printer from the power source before beginning any work. Avoid touching any exposed circuits or components while the printer is plugged in. Use caution when working with the heated bed and hotend, as they can reach high temperatures. Wear safety glasses to protect your eyes. If you are not comfortable with electrical work, consider seeking assistance from a qualified technician or experienced maker. Ensure that the work area is clear of flammable materials and that there is good ventilation.
Step-by-Step Upgrade Guide
Follow these steps to upgrade your Tevo Tarantula’s main board. This structured approach minimizes errors and ensures that all parts are connected correctly. Be patient, take your time, and double-check each connection before proceeding. By following this detailed guide, you can confidently install and configure the new main board, realizing the full potential of your 3D printer.
Removing the Old Main Board
Start by disconnecting the power and removing the printer’s base cover. Carefully disconnect all the wires connected to the old main board, taking note of their positions and connections. You can take photos for reference or label the wires with tape to ensure proper reconnection. Remove the screws holding the old main board in place and carefully remove the board from the printer. Be mindful of any static electricity that could damage the components. (Image tevo-tarantula-main-board.webp)
Installing the New Main Board

Mount the new main board in the same location as the old one, securing it with screws. Reconnect all the wires that you previously disconnected. Refer to your photos or labels to ensure that everything is connected correctly. Make sure all connectors are secure and that the wiring is tidy. The quality of your connections affects the performance of your printer. Use zip ties or cable clips to keep the wiring neat and organized to prevent accidental disconnections. (Image installing-new-board.webp)
Connecting the Wiring
Ensure that the wiring is connected accurately to the new main board. The wiring of stepper motors, endstops, and thermistors must be plugged into their corresponding ports on the board. Check that the wiring for the heated bed and hotend is correctly connected. It is also necessary to connect the power supply and, if applicable, an LCD screen. If the new board has different terminals, review its documentation to know the proper connections. Double-check all connections before applying power to your 3D printer. (Image connecting-wiring.webp)
Configuring the Firmware
The firmware configuration is critical to ensure that your new main board operates as intended. After installing the new board, you will need to configure the firmware settings to match your printer’s specifications. This often involves adjusting settings to your printer’s unique requirements, such as the size of the build plate and motor steps per millimeter. Firmware configuration allows you to customize your printer. Always ensure that the firmware is correctly configured to avoid printing errors.
Flashing New Firmware

You will need to flash the new firmware to the main board. There are several methods to do this, including using the Arduino IDE or a pre-compiled firmware file. Connect your printer to your computer via USB. Select the correct board and COM port in the Arduino IDE. Upload the Marlin or other firmware to the new main board. If you have a pre-compiled .hex file, you can flash it using tools like XLoader. Always double-check that the firmware is compatible with your board and printer model. (Image firmware-flashing.webp)
Testing and Calibration
After flashing the firmware, test and calibrate your 3D printer. Perform a test print to check the printer’s functionality and that the settings are correctly configured. Calibrate the bed level, and make sure the nozzle is at the right height. Check the movement of all axes, and verify that the extruder is functioning. Observe for any unusual noises or behavior during the print. If needed, adjust the firmware settings and repeat the test printing to resolve any issues. If problems occur, review your configuration or consult online resources. (Image calibration-test.webp)
Troubleshooting Common Problems
During the upgrade process, you may encounter issues. Common problems include connectivity issues, printing errors, and firmware-related problems. Understanding and resolving these issues is a part of the process. Troubleshooting is essential for any upgrade procedure, and the ability to address these issues will ensure a successful upgrade.
Connectivity Issues

Connectivity issues can manifest in several ways, such as problems connecting to your computer via USB or difficulties with SD card recognition. If you cannot connect to the computer, try a different USB cable or a different USB port. Ensure that the correct drivers are installed on your computer. If your SD card is not recognized, check that the card is formatted correctly. You should also verify the SD card reader functionality. Ensure all the connections of the printer are secure.
Printing Errors
Printing errors can vary, including issues such as layer shifting, poor bed adhesion, or extruder problems. If you experience layer shifting, verify the belt tension and motor current. If you are facing adhesion problems, level the bed correctly and use the right settings. Make sure your nozzle is correctly set at the appropriate temperature. The issue may also stem from incorrect firmware settings. Use online resources to discover solutions for each particular error.
Conclusion
Upgrading the main board of your Tevo Tarantula 3D printer can significantly improve its performance, print quality, and user experience. It is a complex process, but with the proper planning, tools, and guidance, anyone can successfully complete this upgrade. By following the step-by-step instructions and troubleshooting tips, you can breathe new life into your printer, unlocking its full potential and enjoying more efficient, reliable, and high-quality 3D prints. Embrace the possibilities that come with this upgrade, and enjoy the evolution of your 3D printing capabilities.